
With the advent of 3D dental intraoral scanners, the process of creating digital impressions has become more efficient and accurate than ever before. In this blog, we will tell you how to make the seamless transfer of these digital files from the Launca intraoral scanner to the dental lab.
Step 1: Add a new lab information in Settings
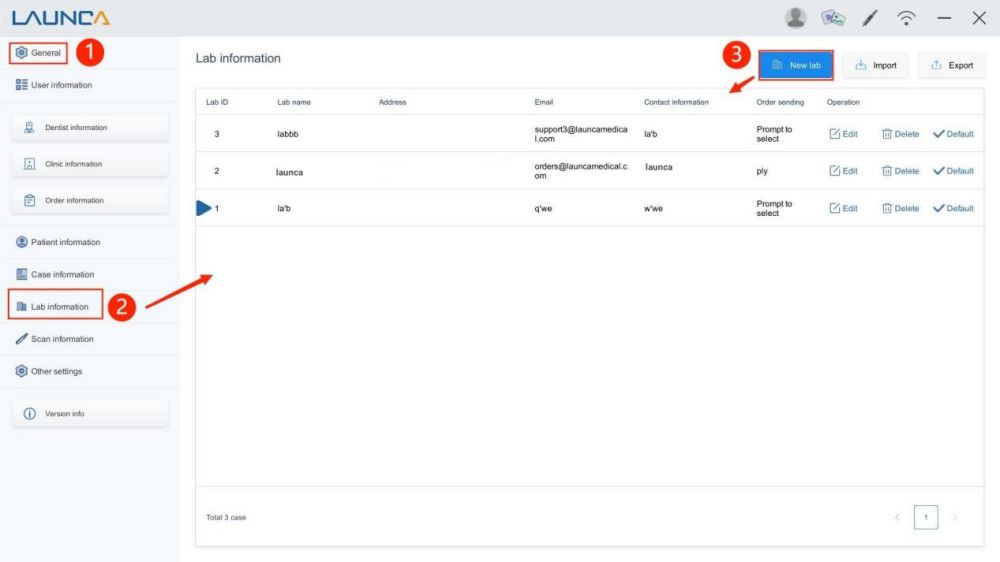
Open the Launca software, click on the settings button. You will see an option called "lab information" at the bottom. Click on it, and once you're in, find the blue "new lab" option at the top right corner of the page. Click on it to create new lab.
Step 2: Fill in important information
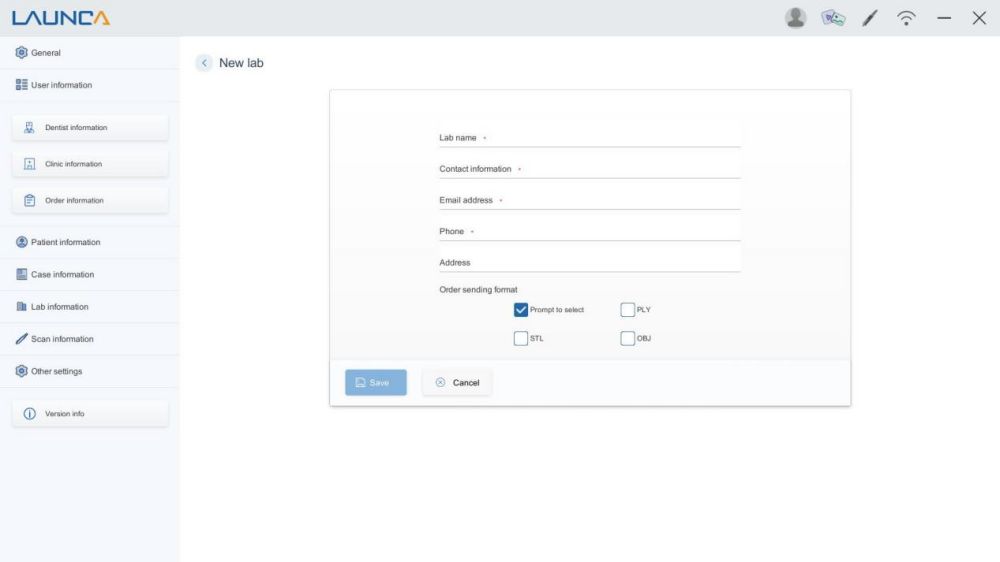
After entering the "new lab" option, proceed to fill in essential information, including: Lab name、Contact information、Email address、Phone number and Address. And don't forget to select the Order sending format(PLY/STL/OBJ).
Step 3: Capture the Digital Impression
Before sending any files to the lab, ensure that you have captured a high-quality digital impression using your intraoral scanner. Position the scanner properly in the patient's mouth and follow the manufacturer's instructions for capturing the desired area accurately. Pay close attention to any areas of concern or detail that may require special attention during the scanning process.
Step 4: Verify and Review the Scan
Once the digital impression is captured, take a moment to verify its accuracy and completeness. Use the scanner's software to review the scan from different angles and ensure that all necessary details are captured clearly.
Step 5: Send the File
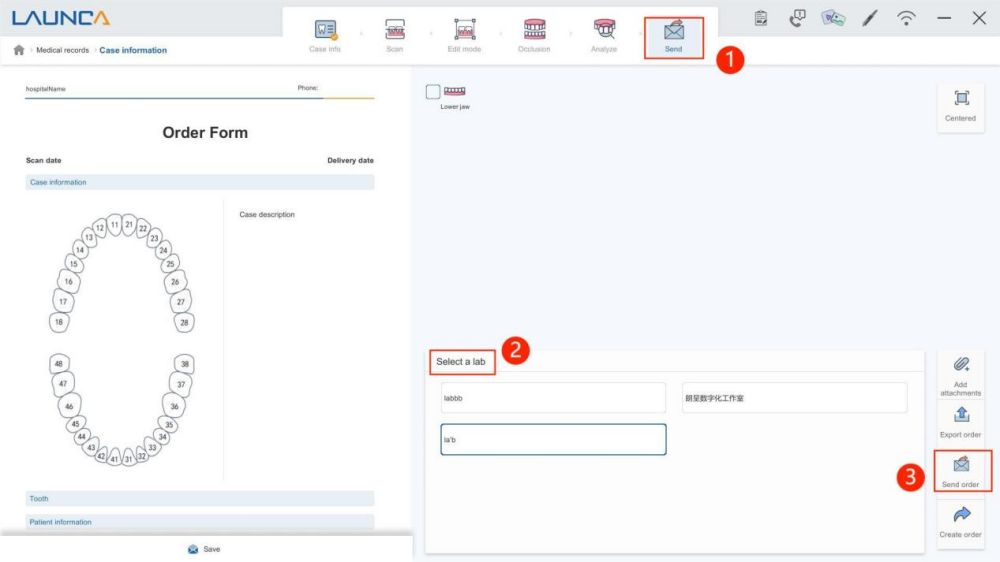
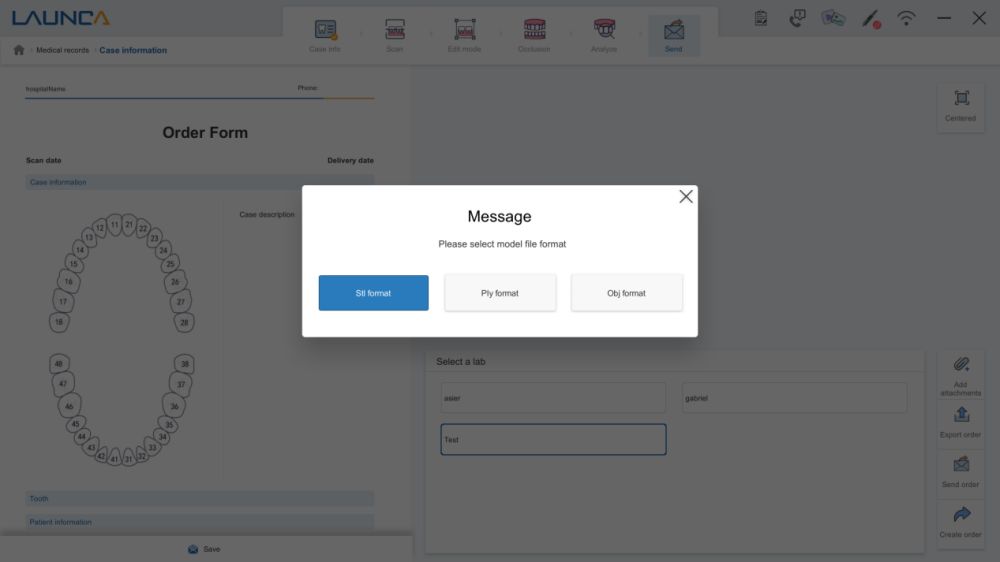
After verifying the scan, it's time to export the digital file from the intraoral scanner. Launca IOS offers various file formats for compatibility with different CAD/CAM systems used by dental labs. Click on the send button to select a lab and the appropriate file format.
Step 6: Choose additional transfer methods
When you select the file, you'll see a QR code appear in the middle of the screen. The purpose of this QR code is to provide you with additional options. In addition to sending the files via email, you can also scan the QR code on your mobile device to view them or share the link with other devices or users for viewing.
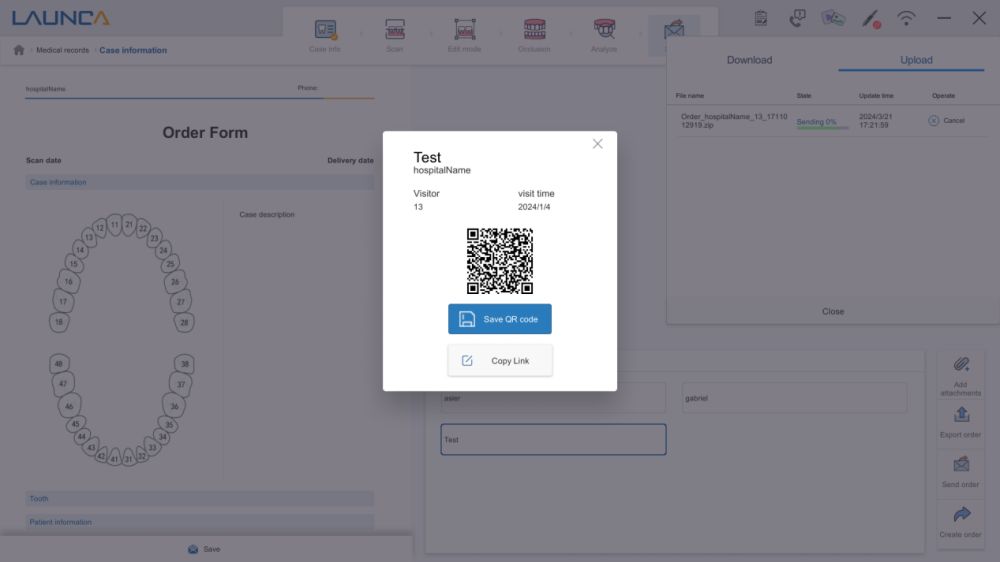
Step 7: Check the file transfer status
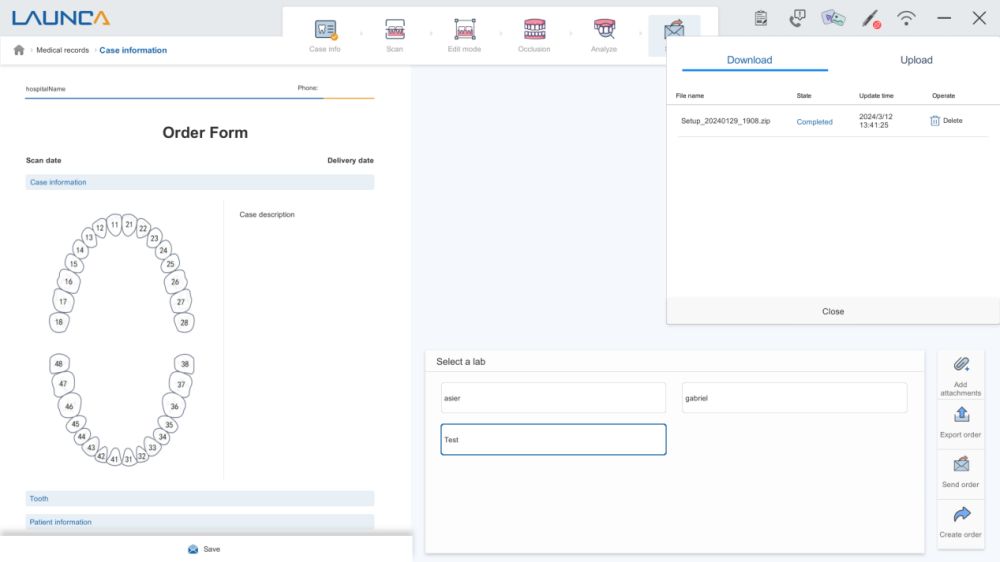
Please click on the WiFi icon located at the top right corner of the screen. This will allow you to view the status and details of the file transfer. Ensure that the files have been successfully sent. If the transfer fails, please double-check the file format and the accuracy of the email address.
In conclusion, sending dental data files from your intraoral scanner to the lab requires attention to detail and effective communication. By following these steps and leveraging the capabilities of modern technology, you can streamline the workflow, minimize errors, and deliver exceptional results for your patients.
Post time: Mar-25-2024


